
Blinking an LED
Blinking an LED takes an Arduino or any other board, an LED and optional, a potentiometer to control the brightness or the speed of the blinking. To make the process of wiring it simpler, I used a breadboard for most of these electronics. I used blocks from Tinkercad to program the Arduino
Arduino Trumpet
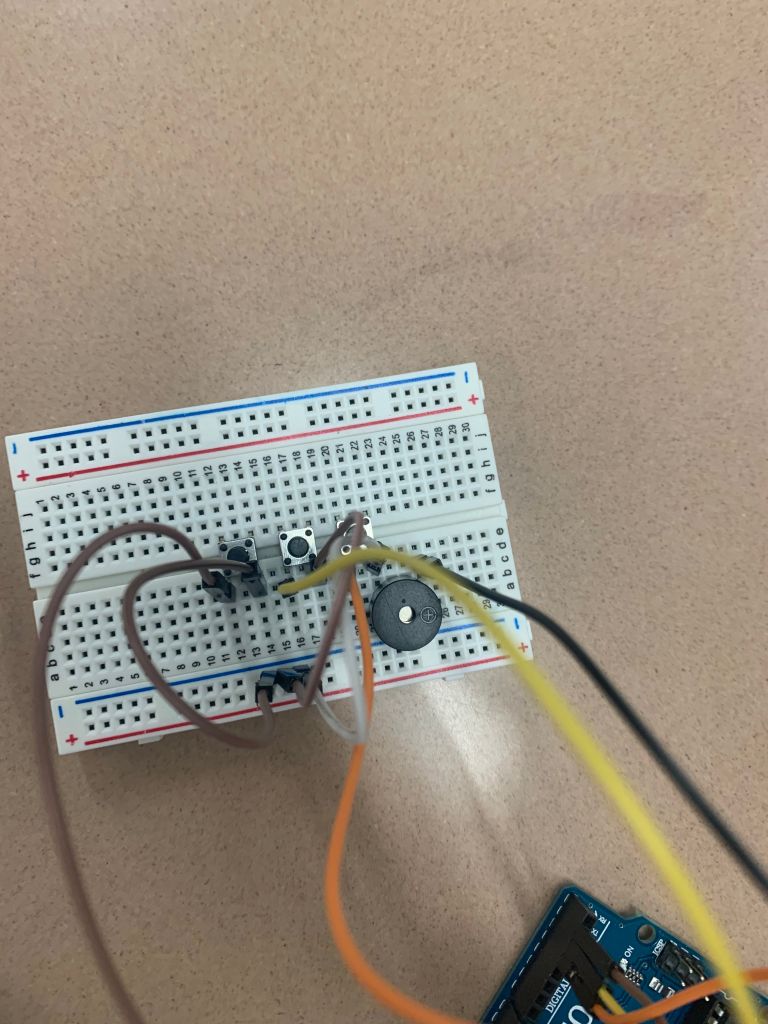
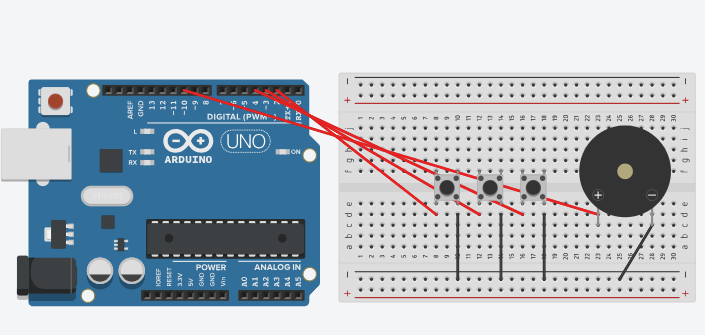
For this circuit, I used 3 buttons and a buzzer. The 3 buttons and the buzzer are all connected to the Arduino. If you click any of the buttons, the buzzer will turn on making a noise. Optionally, you could use a potentiometer to control the volume but I decided not to. I used code from SparkFun
Simon Says (Memorization Game)
This game is made on a breadboard with a few LED’s, buttons, and a buzzer. The game is simple, once it starts it turns on 1 LED at a time and keeps on going until you lose. The game is based on memorization. Code was from SparkFun.
Distance Sensor
The sensor works by sending sound waves and measuring the time it takes to hear it back. In this circuit, the distance of the sensor is controlling a RGB light. Code used from Sparkfun
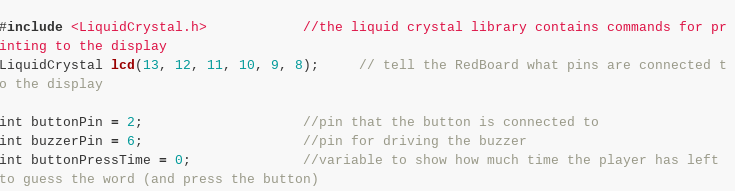
LCD Screen Guess Who
Unfortunately I couldn’t get this one to work so I have no pictures. I watched a lot of videos on LCD displays and realized the problem was not in the code, but a small piece of plastic and metal inside connecting 2 pins was missing (which would light up the LCD screen). I did manage to get the code working. The code was a bit tricky because it used an LCD screen with 8 pins, but the LCD screens we were provided had 4. Code from Sparkfun
Original Code
Modified Code
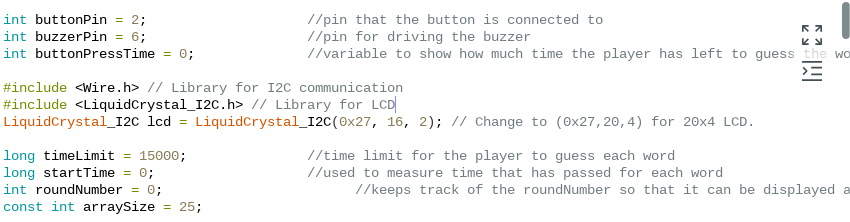
The code shown in both of the picture is only the code from the top where the pins are defined. The difference in code is that the LCD screens use different libraries. The library tells the LCD of how to print the code on the LCD.
This wasn’t my first introduction to Arduino because I have been working on a personal project that involves many Arduino’s and electronics. I have a post for my recreation of a 737-800 Flight Simulator on my website. One thing I have learned, is taking parts of Arduino code and making them work with eachother.
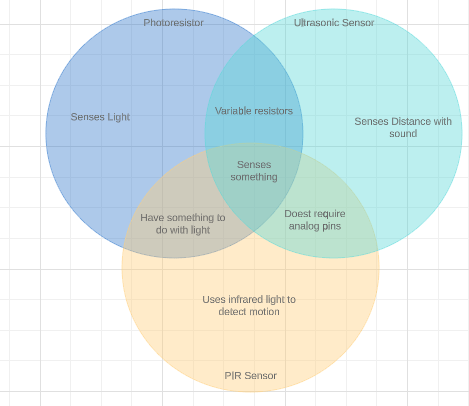
Venn diagram of Arduino parts.
Works Cited
Sparkfun Inventor’s kit experiment guide – v4.0. (n.d.). Retrieved from https://learn.sparkfun.com/tutorials/sparkfun-inventors-kit-experiment-guide—v40/introduction
